Another tutorial today, this time is to create some nice and effective web buttons in photoshop. This is easy and does add that extra edge to your pages.
Firstly open a new document in your adobe photoshop program. I am going to make my buttons 50 pixels in height and 120 pixels in width.
With your blank canvas, create a new layer, hold a ctrl + alt + shift+ n to create a new layer using the keyboard shortcut.
Next thing to do is select the rounded rectangle tool. The shortcut for this tool is “u” so just hit the u key and make sure you have the rounded tool selected.
Now select a color you would like your buttons to be, I’m going to make mine red, now draw a rounded rectangle that should fill about 80% of the canvas area, try to keep it centered. Which should give you something to the following image.
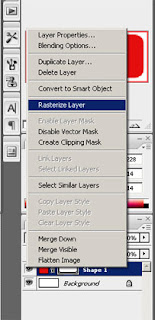
The next thing to do is to rasterize the layer, this will turn the data layer in to an image layer.
After your rasterize the image its time to load the selection for your button so we can create the effect. Now goto the select menu and click on load selection.
With the selection load its time to get the area that we will add the glossy effect on, now select the marque tool and make sure its set on the rectangular tool with the subtract option picked, if your not sure on these options the image below shows the options you need to have selected.
Now with this, select the lower half of the area selected from the load selection option. Now with this selected are you need to create a new layer (shift + ctrl + alt +n) and fill it with any color, it doesn’t matter what color as we are going to gradient overlay it. I chose white.
Now with this selection you need to setup a gradient overlay. This is pretty easy as we are just going to use default settings, give or take one. So click on the layer menu then click the layer style menu the click the gradient overlay option, You now need to select the color that you set your first layer as, mine was red so i chose red again, now click on the gradient drop down menu and click the first one. Mine looked like this.
With this done my image now looks like this-
With this done, its time to give it a bit of definition, am going to use a str0ke for this, select the layer 1 and now go to the layer menu and layer style again but this time click on stroke. Change the size to 1px, position to outside and change the color to black! like this-
And that should be us! You can add some text over the top of the image with the text tool to make the buttons more meaningful but this is my finished product-
Any questions or comments don’t be afraid to leave me comments!
Source: www.follor.com
30 Maret 2009
Langganan:
Posting Komentar (Atom)


Tidak ada komentar:
Posting Komentar